During my Summer Holidays (Dec-Jan) I did a number of lessons from Tam's She Blooms in Ink online class. I enjoyed them immensely and completed 4 of the lessons on A3 watercolour paper
I began on separate sheets because I always intended to sew them together as a book. This month, I decided to complete a couple of the other lessons and finish this project. These are the last 2 faces I've recently shared from this class on the same paper as the previous lessons.
My original thought was to make a star book {although much larger scale than the ones I've made in the past♥} so I knew I needed an uneven number of spreads- these have 7.
I wanted to sew my pages together as a feature, and black thread was the obvious choice as a strong colour to edge the pages and to tie in with the black pen work. I stitched each page back-to-back using my sewing machine
I decided against sewing the last 2 pages back-to-back because then I can't fold the book down in traditional format
One option is to cut the last folded spread apart to use as covers, or to add extra covers - and ties for closure are a feature of the small books
In the end, I decided I would like to make one more face, and just have blooms on what will be the back cover. I decided to work with the blank watercolour paper which shows once the book is folded down together and began with the front cover
I thought the back just needed some blooms on part of the cover so I began with sprays and inks before adding the pen work
To finish I sprayed the front and back with matte varnish for some added protection of the cover art, and then edge stitched with black thread
I like seeing the exposed folds in the spine
And I can still have it out in star format if I wish ♥
I am very happy to see this project completed and while I can always refer back to lessons, it's great to feel like I actually finished a class!
Tam's She Blooms in Ink online class is now available for self study with life long access. You can register HERE. See all my posts about this class HERE and my Flickr album HERE.
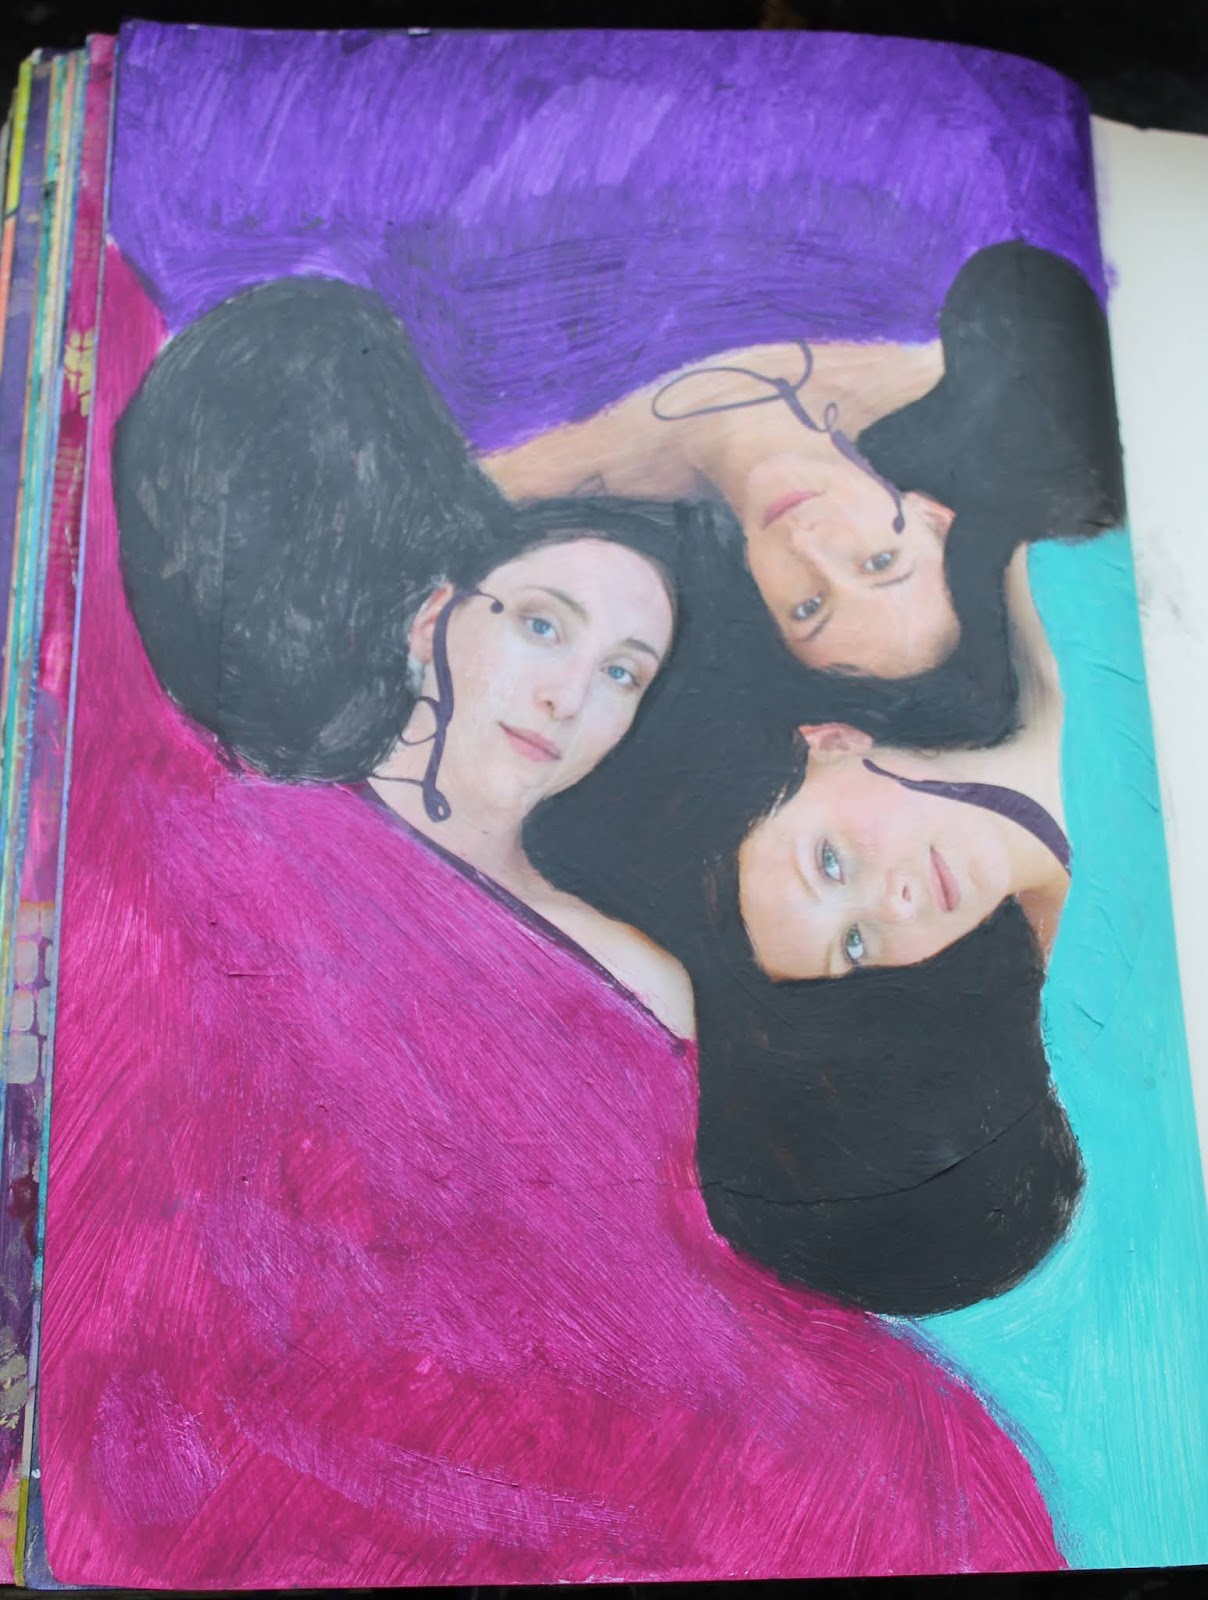
It's been a week since I blogged and when you see my completed art journal page you'll see why...it's just taken a while! I was doubly inspired by a post by Alisa Burke HERE where she used acrylic paint and white pen patterning to transform magazine faces AND recent lessons in my classes with Effy Wild where she demonstrated a lovely batik technique also using white pen patterning. I loved the idea of using the 'easy' option of a magazine face to alter, and found this wonderful advert of 3 faces
It reminded me of Klimt's painting "The Virgin" and I am inspired to pattern the faces, the hair, and garments. First I positioned and glued the faces on the page, and then blocked out hair and garments with acrylic paints
I added clear gesso to the faces so I can add pen work more easily than to the glossy magazine surface. First face and hair doodles.
I adored this process so much and I thought they all looked so cool I've taken photos of each individual face for you to enjoy. You can also click on any photo to enjoy it larger.
Was so fun to come up with different patterning ideas
Then it was time to start patterning on the garments. Interesting to see how doodled ideas lead you onto others - this one was vertical from her neckline
The teal led me to a top border and then florals
Because of the line of collage beneath, the purple begged to be more of a cloak with feathers
Here's the entire page...but we're not finished yet
I wanted to try Effy's glazing batik technique. These are all the mediums I used over the paper on this page :
As you can see I've got excellent matches in transparent high flow acrylics to go over the acrylic colours I used for the garments. So with a deep breath {and a baby wipe handy in case I hated the effect!} I added the layer of transparent colour
And it was the opposite of hate... I LOVE the effect, especially when you look at the whole page with the drama of the faces
You can sign up for classes with Effy Wild HERE and with Alisa Burke HERE. Alisa is currently celebrating 10 years in business so has some amazing class bundle deals. See my Flickr album of all art work inspired by Effy's classes HERE.
I'd already attempted a couple of tilted faces inspired by Tam in my altered art journal and was very happy with how they turned out:
See Calm HERE and my grateful warrior HERE. I wanted to try one more so I had all the examples of the lessons in the same watercolour paper format. This was my initial sketch and first shadings
And more colour added - nice to try something more inky than my previous faces inspired by this lesson
Limited supplies - this time using watercolour crayons and it's great to use ink from spray bottles that are too empty to spray. This turquoise {hydrangea blue} has a lovely glow
Needed the white pen for light details this time
LOVE the look of the white over that soft pink
Close-up of her face shading and you can click on any photo to see it larger
I like that this inky technique means she can be messily imperfect
A fun way to spend time creatively in my holidays and I keep remembering Dina Wakley's often-repeated words "Done is better than perfect".
Tam's She Blooms in Ink online class is now available for self study with life long access. You can register HERE. See all my posts about this class HERE.
During my Summer Holidays (Dec-Jan) I did a number of lessons from Tam's She Blooms in Ink online class. I enjoyed them immensely and completed 4 of the lessons on A3 landscape watercolour paper
as well as having a go at a couple of upturned face portraits in my altered art journal
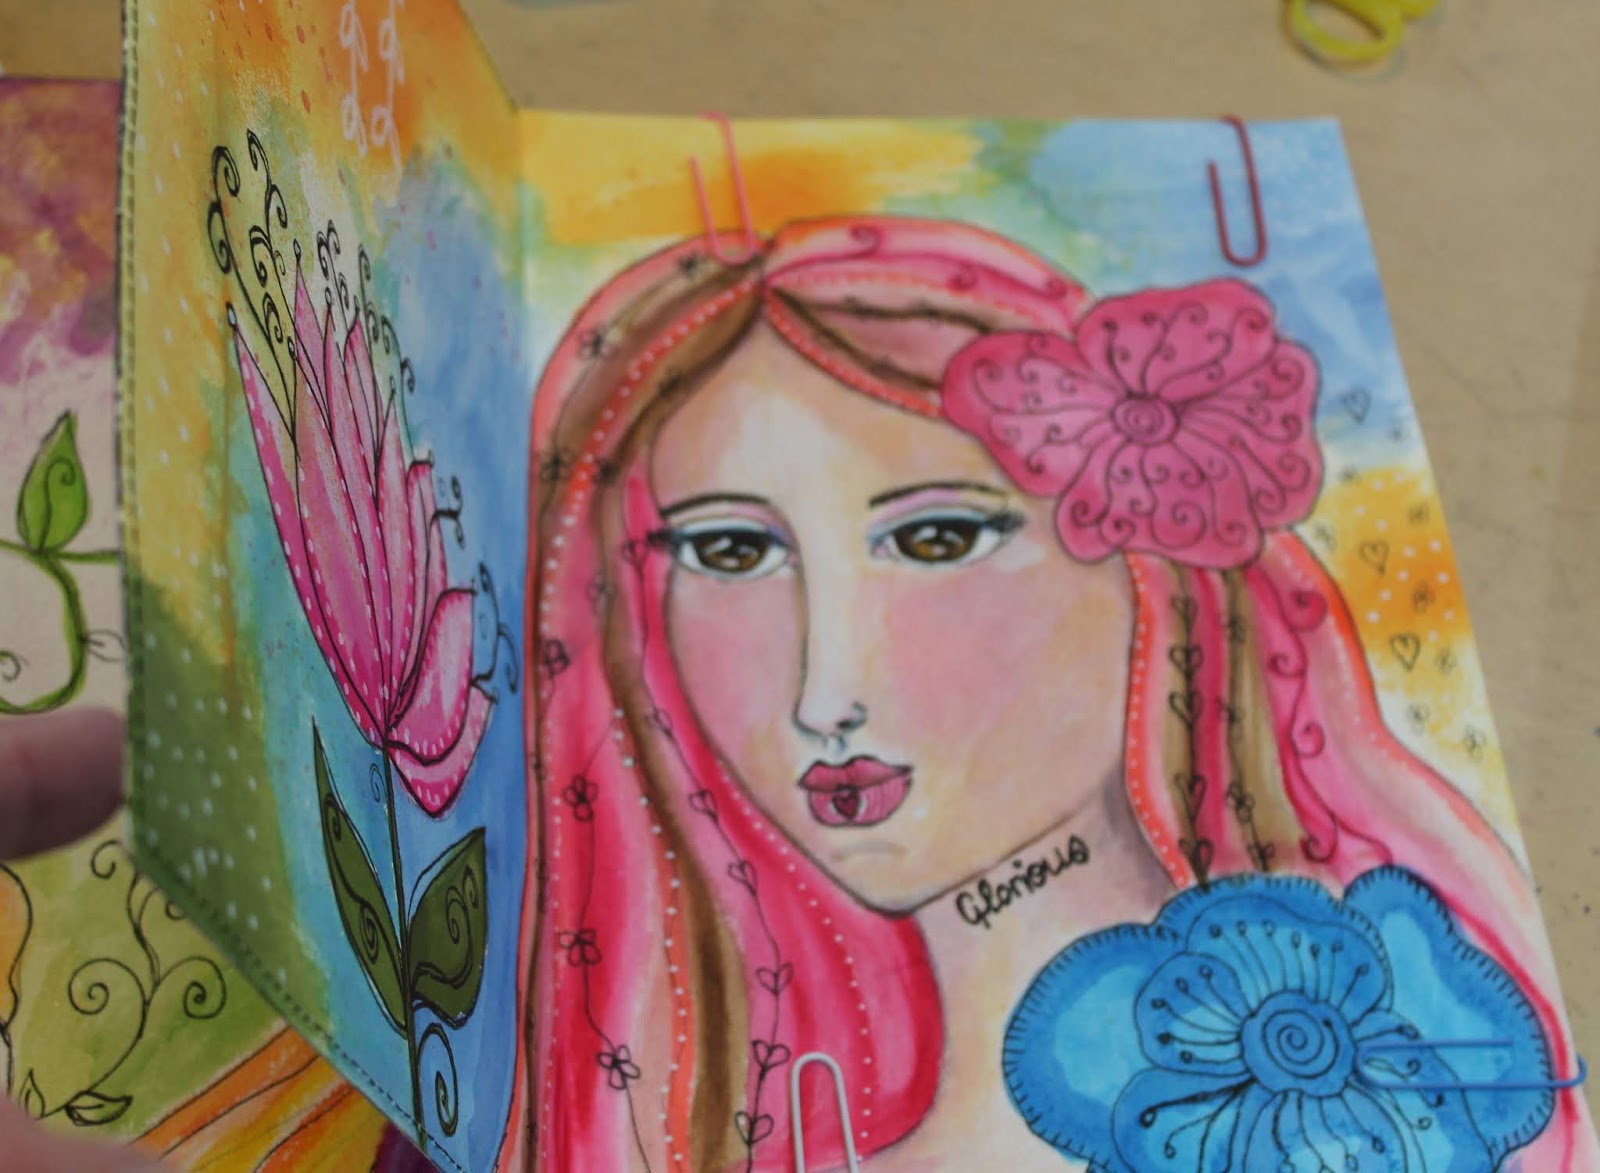
I began on separate sheets of watercolour paper because I always intended to sew them together as a book. This month, I decided to complete some of the other lessons. This class actually has instruction for 10 faces if you do them all but I decided 2 more would satisfy my feeling of completing the class for now (Life long access ♥). This lesson was the high contrast portrait - I liked that I was attempting another angled portrait but this time facing the opposite way. First a pencil sketch
and then I decided I'd try using my distress inks for this lesson with a water brush
This worked really well because you can add water for lightening of colours - this is all spiced marmalade ink :
And I went on to add lots of high contrast inky loveliness. It was great to be limited by my inks for choice of colours.
Then it was time to add some black - I decided to put some black ink into a separate brush for this - the ink was a bit thick so I added some water too
I only used a very little white sharpie paint pen on her eye. The other white on the face is the watercolour paper without colour. Inky blooms in place of hair
and here she is finished ♥
I am so happy with how she turned out. She definitely blooms in ink with high contrast, and I am especially proud of how I managed to leave some white space on this one. Tam's She Blooms in Ink online class is now available for self study with life long access. You can register HERE. See all my posts about this class HERE.