Friday, August 29, 2014

Watercolour Calendar Journaling

I'm still working in my watercolour journal that I shared HERE and the altered cover is HERE. I started this week's spread with a sentence of found text that I thought would be fun to answer :
I finished another envelope and was noting (again!) my desire to stitch more...It was my husband's birthday the week I did this spread, so I was able to add an appropriate stencil - found in the cake decorating aisle!
I loved the previous spread but it was a hard act to follow when I wasn't feeling my best 
I decided that I didn't like all the white background on my page, so I decided to add some spray through punchinella - this is the second page which I used to soak up the extra ink
and the left hand page was a little more interesting in places, and a little harder to read in others! Oh well - it's all learning. Overall I like it better than it was (sorry no photo of the plain white background)
click on any photo to see it larger
I was working on my last envelope for "me time messages" and hadn't put my open calendar diary far enough away so had to blend some oversprayed colour...obviously this was my week to to be taught more than one lesson!
Don't mind the effect though...just go with it. It's not as hard to read as the photo suggests
The other page needed a bit of flower power I thought, so I sprayed some ink on the page first, and added some flower doodling
I was working on my "me time messages project" - I remembered to print out and put in photos of the completed sides of envelope #4, but had to add envelope #5 as a flip out - like the different effects
Another birthday that week - I like taking photos of the kids with their present line up
Ended up with another colourful and "somewhat" arty spread.
You can see all my calendar journal pages in my flickr set HERE.

Wednesday, August 27, 2014

Bereavement card

Began with this
It became this
Inside, a piece of watercolour paper. The stitching outlined with soft watercolour paint ready for the written message

Friday, August 22, 2014

Watercolour Calendar Journaling

Alisa Burke's Flower Power class got me inspired to start my next page with a doodled flower and brilliant watercolour 

Then it was fun with lettering and a border of washi tape
I'd been wanting to add more artful touches to my pages, so went back to look at one of the original projects that inspired my daily calendar journal practice.
Click on any photo to see it larger
Looking at that inspired this
I like using different watercolour backgrounds for the journaled sections. This is twinkling H2O applied over a cheap watercolour pencil that didn't blend well enough once the water was added. Lots of learning happens with this daily practice
I was working on my "me time message" envelopes. You can see photos of completed envelope #2 on the above page, and below is how the second page of this spread started - with left over paint from stamping on that envelope.
Then I started envelope #3 with sponge and an ink pad through a stencil. 
Loved that subtle effect so that was added to my journal page too
I continue to note what I am reading and viewing in this journal. I really enjoyed this book by Sally Beauman:
Interesting characters and development of their relationships, and the plot involved the discovery of Tutankhamun's tomb so some great real historical detail too.
Back in the journal, I added colour to the stamped flowers using twinkling H2Os
And some doodled details finished them off - love that sumptuous colour
Really happy with the floral additions to this spread
You can see all my calendar journal pages in my flickr set HERE.
Hope you have a lovely weekend - I am going away with girlfriends so looking forward to lots of relaxing and beach-walking...taking my art journal too of course :-)

Wednesday, August 20, 2014

Flower Power class with Alisa Burke

I was so VERY excited when I won Alisa Burke's Flower Power online class for free and was then VERY frustrated when my computer went out of action when the class first became available!
Finally I had a chance to immerse myself in her lessons...First I traced some flower shapes from photographs and pictures from some great floral gardening books
This was a really good exercise - it very quickly gave my brain inspiration for flower shapes and doodling. Then I had a play with drawing flowers to fill a page
and this next page was done after spraying colour on the page as the first layer
I've also got a few flowers in my watercolour journal inspired by this class
I love how these turned out. While I really want to be getting back to stitching, these are a wonderful way to add colour and creativity to my evenings.
And I'm looking forward to being further inspired by Alisa in her new class that starts on Friday - this is the last of the 4 classes that I won
For details of the class and to register go HERE

Sunday, August 17, 2014

The Last Me Time Message : 6

"Me Time Messages" is finished. I've really enjoyed this project and I had lots of  fun with this last envelope: instructions HERE.
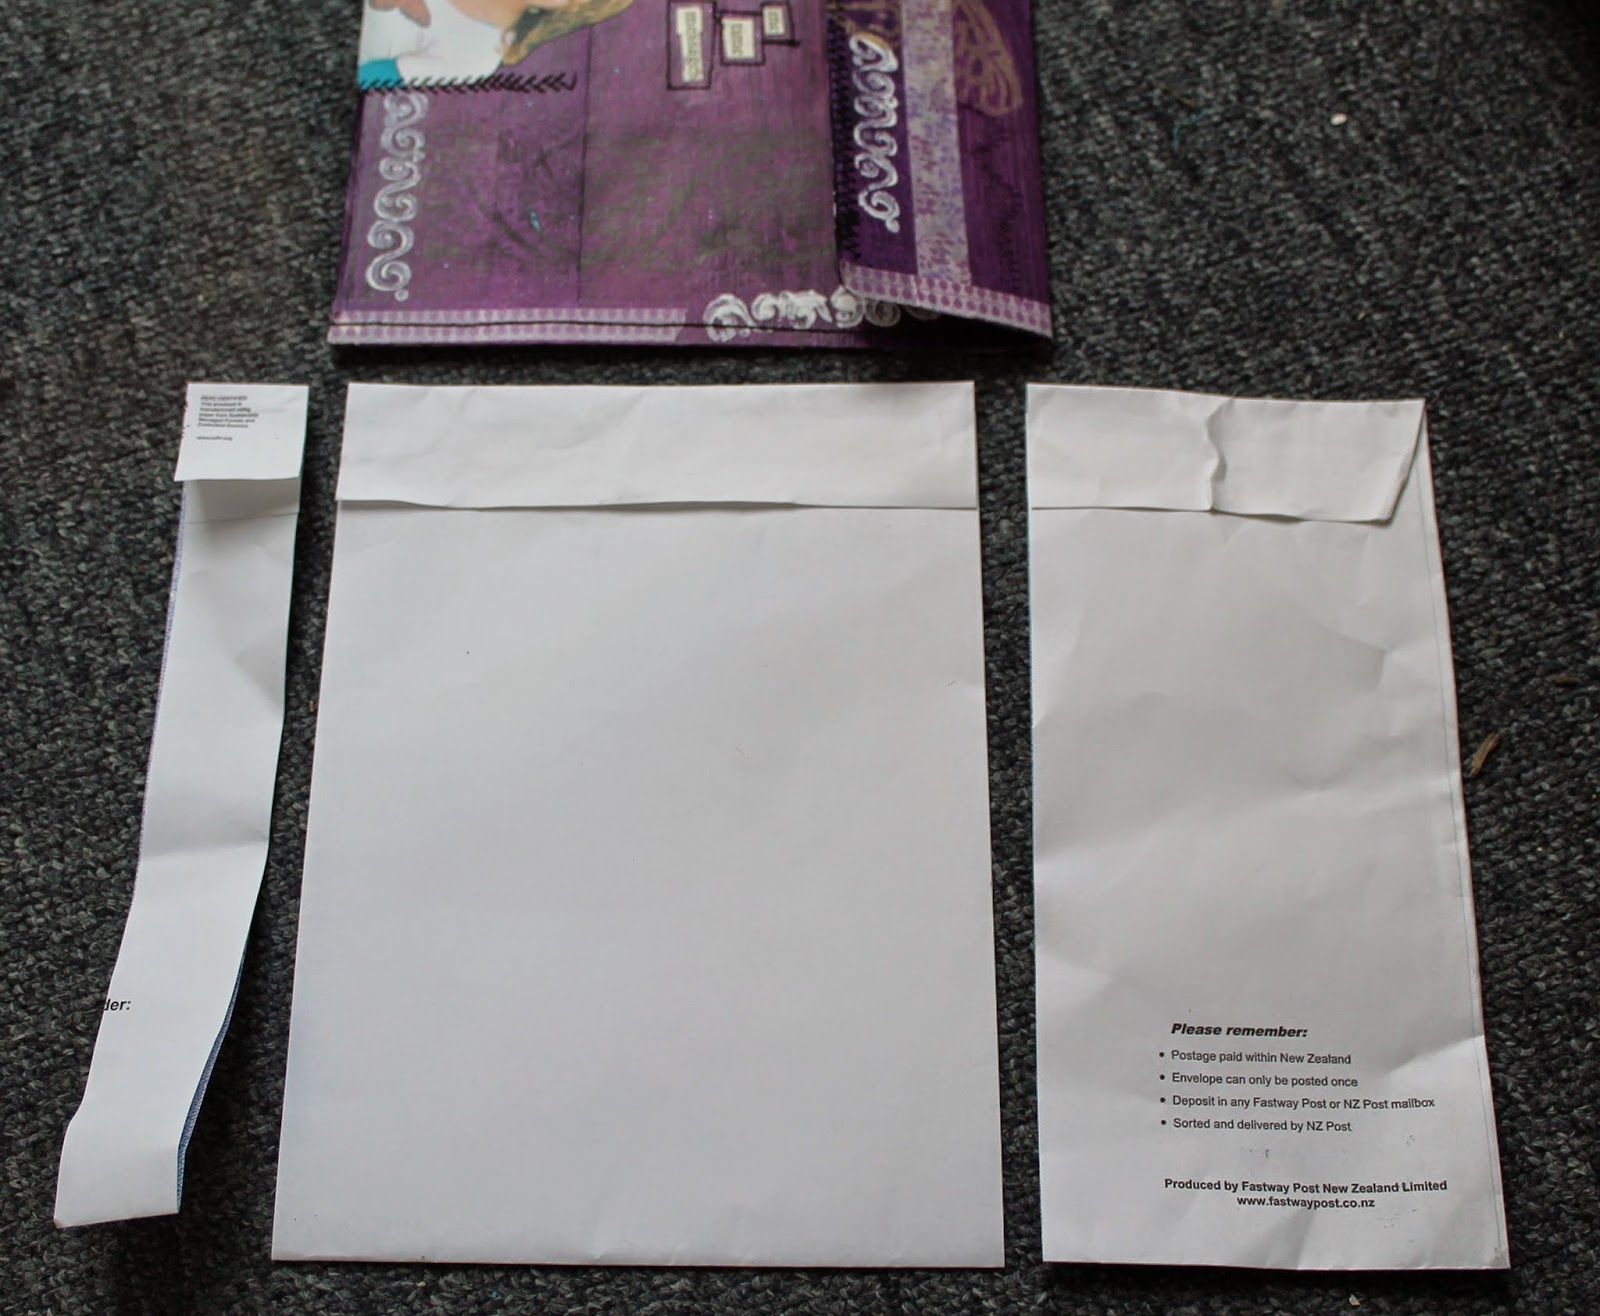
My focus for this envelope was "I am creative" and I wanted the envelope to include stitch as an aspect of my creativity that I want to develop. I started with a very large envelope which I cut down so it would fit inside my cover
Then I opened it out to decorate - I am intending to add stitch as part of the embellishment, and to stitch it closed as I did with my cover. First was a layer of gesso and then modelling paste scraped through a stencil- you can use an old credit card or a paint spatula for this.
I removed the stencil and applied it a few different places across the length of the opened envelope paper - quite like that some colour from a previous project has transferred a bit.
Click on any photo to see it larger
Here's a view from the side so you can see the texture modeling paste gives - I love it.
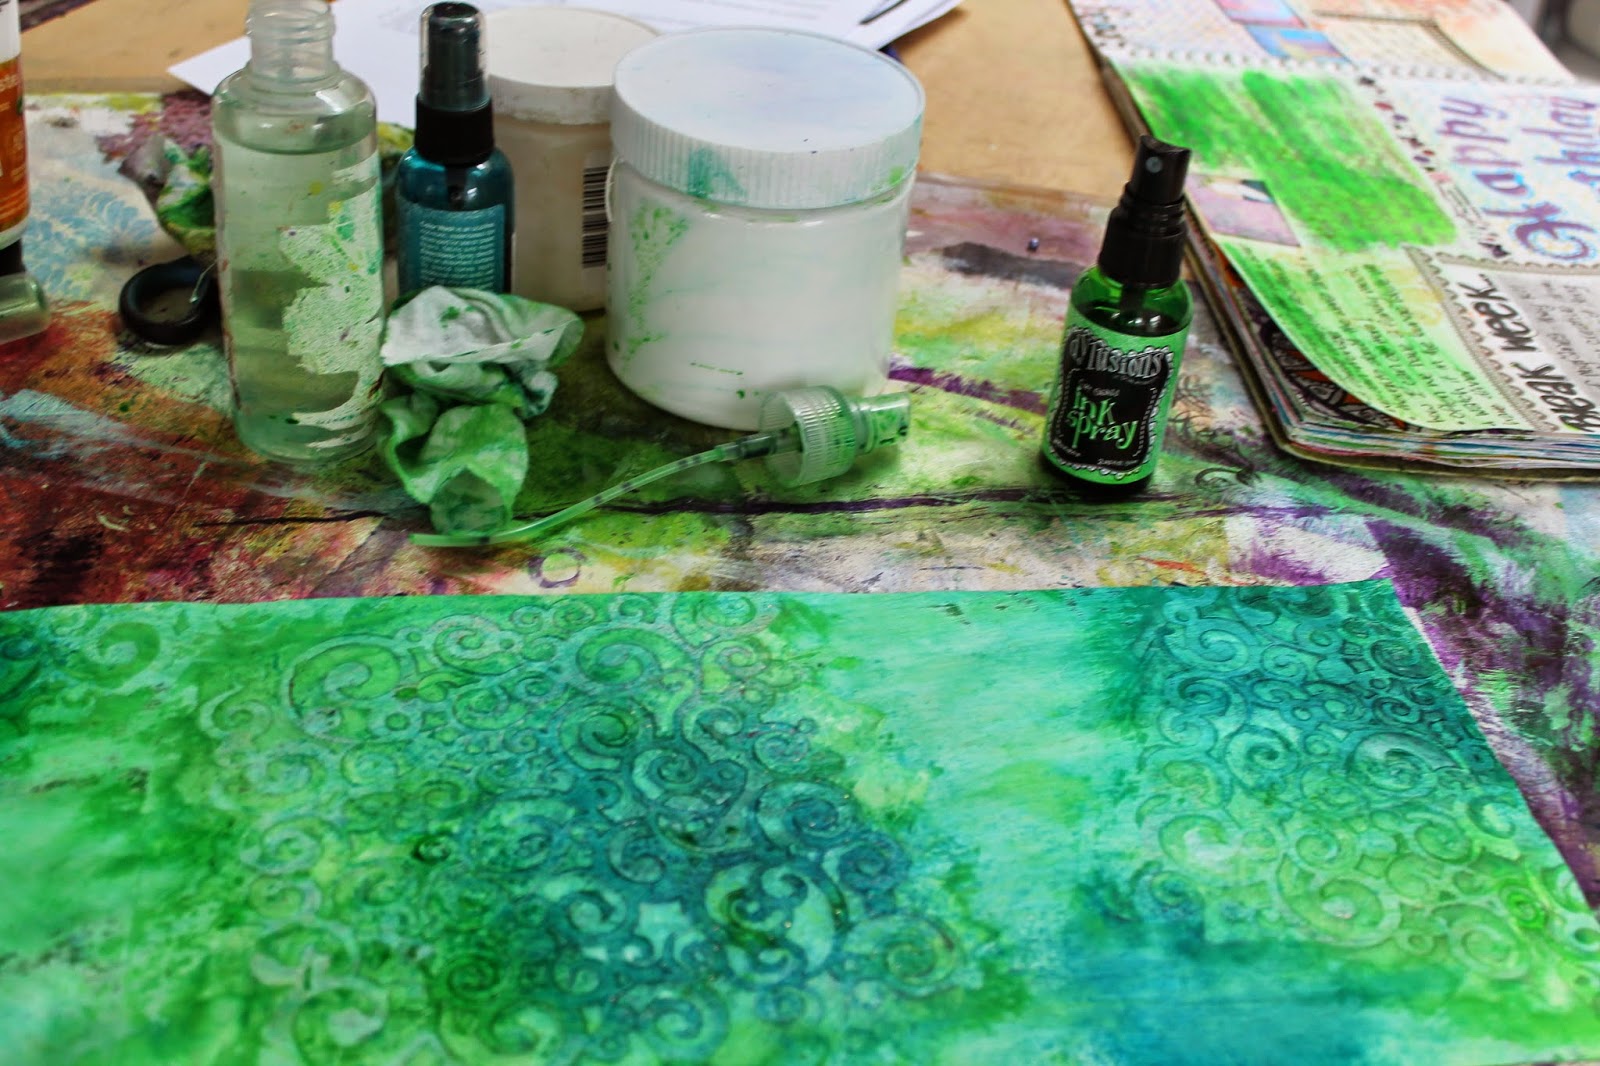
Then it was time to add some colour. I started with a couple of my fav sprays
And then added some gold to warm it up just a bit
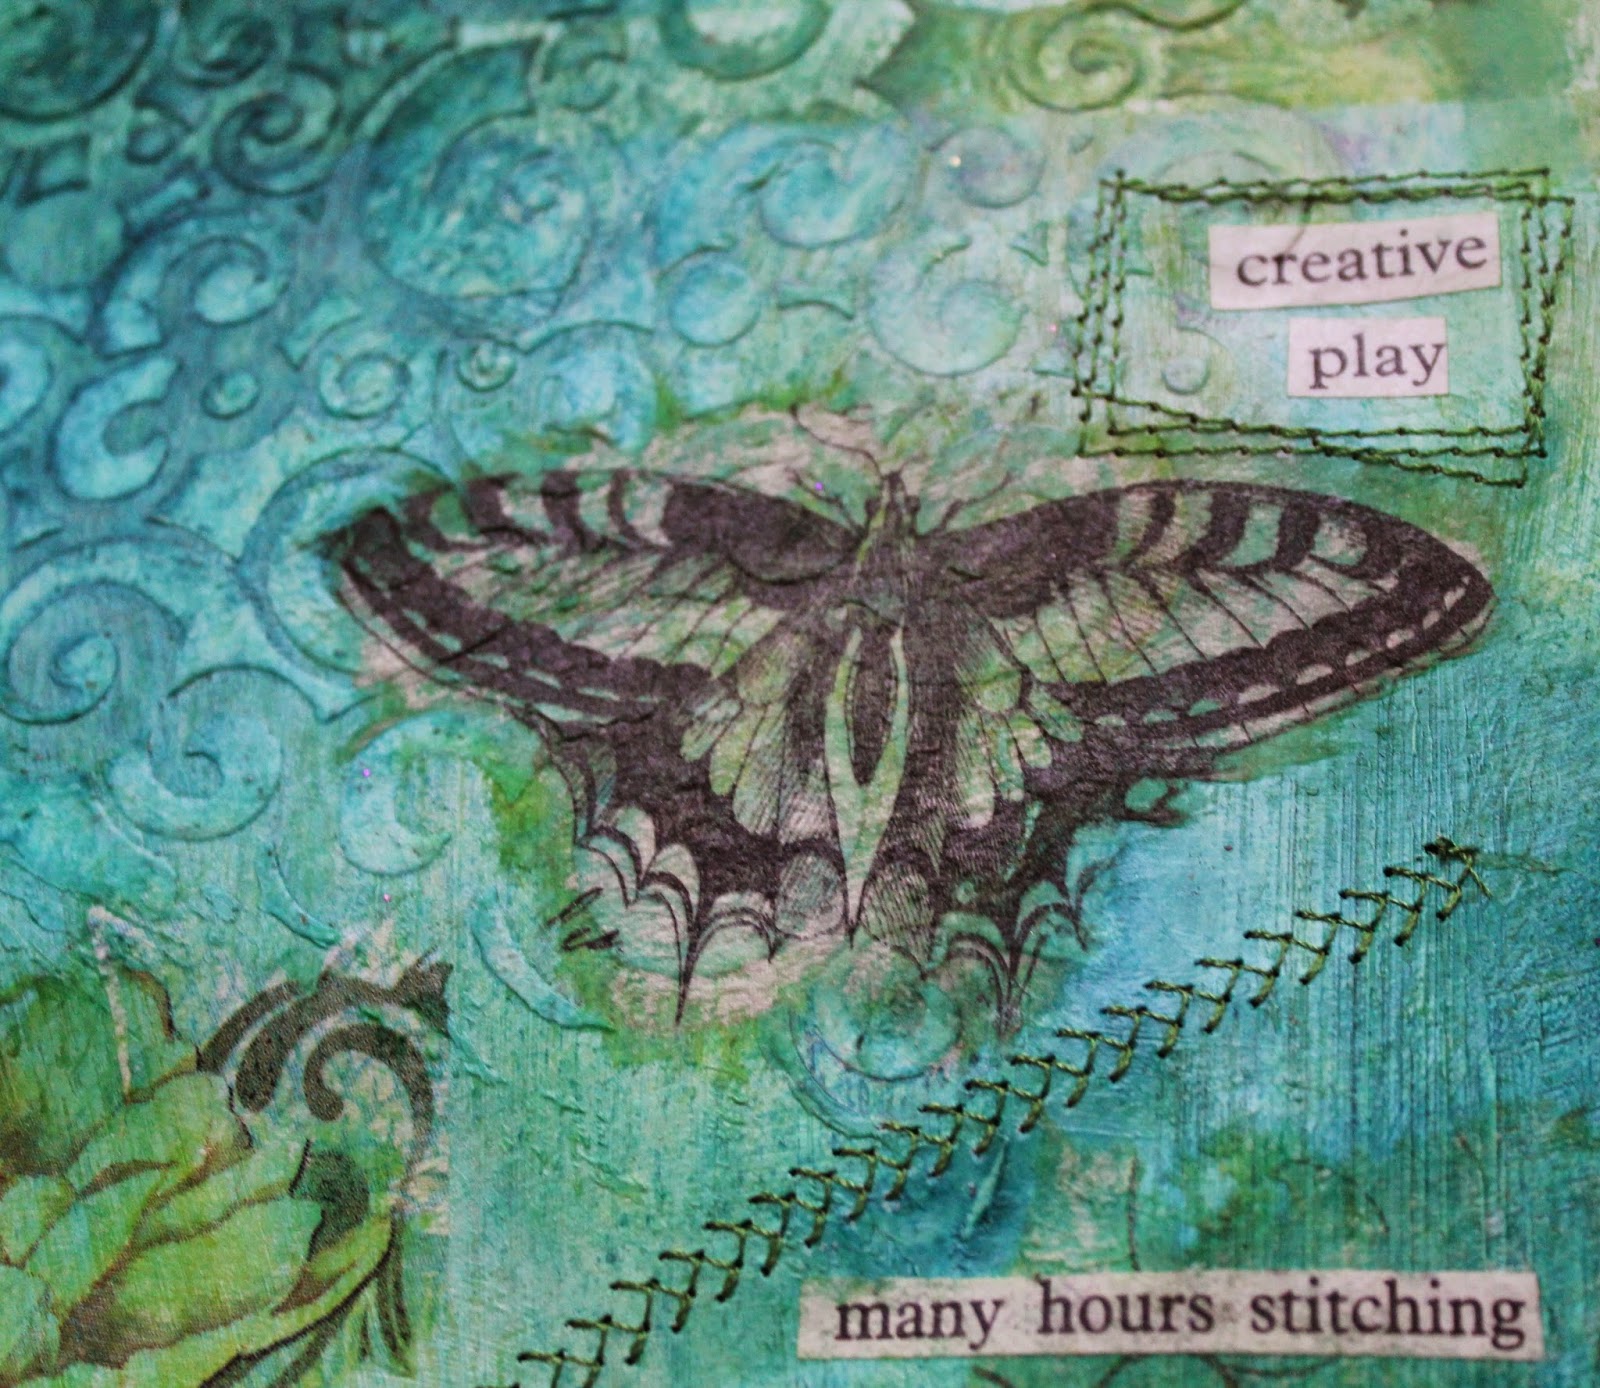
The next instruction was to stamp on some tissue paper and glue that to the surface. I love to use paper serviettes in my work, so I pulled out a couple of my fav's
I used both of these recently in my fabric banner :
Click on the photo to see the details larger
and I think I've used the last of that blue butterfly serviette - also seen on this altered book cover :
To apply the serviettes, tear out your shape. You can make this easier by running a line of water with a brush around where you want the tear to be. Then separate the top layer from the 2 under-layers, apply gel medium to your surface, place the serviette on top, and smooth it into the background with the brush you used to apply the gel medium. 
I forgot to take photos of the next stages because I fell in love with what was evolving and couldn't stop :-) I also left the rest of the original instructions behind at this point and it became totally my own piece. Here's some detail shots of my additions of serviettes, found words, small strips of sari ribbon, and stitch
Here's the full view of each side of the completed envelope - I stitched up each side
and across the flap closure
See all the instructions HERE, and all of my postings from the workshop HERE
Related Posts Plugin for WordPress, Blogger...