Workshop Thursday : Stamp Carving
Had a really fabulous day finally having a go at carving stamps from plastic erasers. One of those things I always thought I would like to do, and now have tried and LOVE....and it is way easier than I thought it was going to be.
3 of us got together for this Play day - it's a good thing to do with others because you can learn from each other's techniques, encourage each other to take a leap, and I didn't have any carving tools!
Rhonda kindly shared hers
We started by watching this fabulous stamp carving video from Geninne on vimeo - go here for her blog tutorial posts about hand carved stamps. She made it look easy to carve a feather, and it was great to see her technique of moving the eraser rather than the blade to get curves...
We just used a variety of cheap plastic erasers from "Dollars and Sense" shop
We were all a little nervous about what and how to do it, so started small and simple
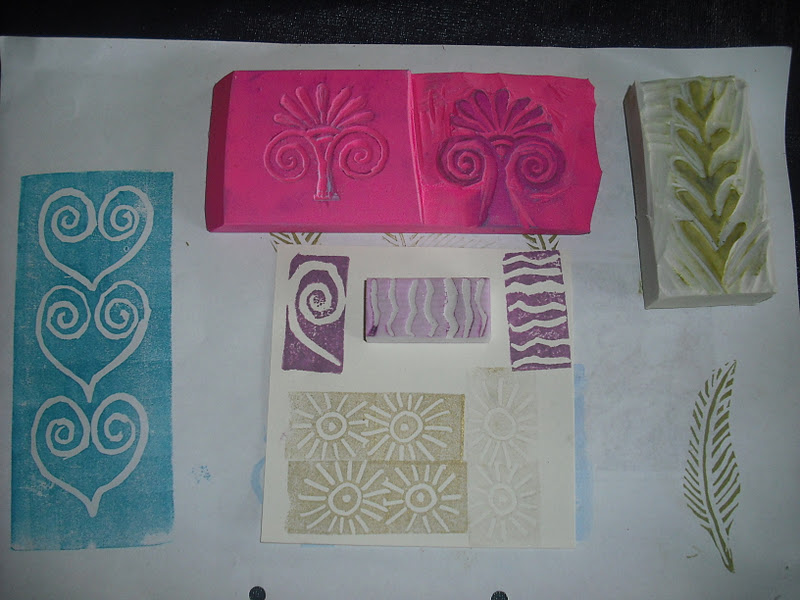
but quickly realised it wasn't as hard as we thought...I like spirals
Once I photographed the stamp next to the stamped image I just had to make hearts ;-)
And that big pink slab of an eraser enables you to carve more on the back.
This book was seriously useful :
Copyright free images with so many possibilities...
Trace your chosen design onto tracing paper with a soft pencil
Place face down on eraser and rub with credit card to transfer design
Carve (here I tried a positive and negative of the same design) - then stamp and enjoy
Another tip - stamping your design is also a good test of whether you need to remove any more behind your design.
Woudn't this make a fabulous border?
And there are possibilities with kiddy erasers already in shapes that you can "customise" within - this is Rhonda's improved butterfly
Now seriously addicted ;-)