I love handmade books and art journal construction was the topic we covered in my monthly Art Journal class on Wednesday night. Thought I'd bring the book forms discussed here in one place for inspiration for next time you bind an art journal.
Simple binding of papers into a cover : we talked about the 3-hole pamphlet stitch (easily modified to 5) = if you start inside you finish inside, if you start outside you can leave longer tails and decorate.
As I was starting to gather my ideas for this class, Marit shared her first post for Quirky Dutch Summer : Journal with a canvas cover. It utilises this simple stitched technique (instructions HERE) and includes a nice idea for using canvas.
My fabric book wrap had pages included using this method. This one I finished to the outside so that I could add beading to the spine.
And I couldn't show this one in class because it's been gifted away but you can enjoy it HERE (same pamphlet stitch, multiple signatures) :
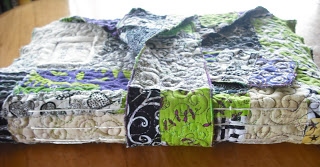
This book I finished with a simple knot inside the signature.
It's also easy to stitch pages in with your machine. I stitched messy lines in the centre of this canvas cover, and then stitched through pages that began as manila folders. Just lengthen your stitch length and stitch slowly
We talked about creating a journal from one piece of paper. Watch Dina Wakley do it on YouTube HERE. In 2022 these are commonly called a Zine.
My pansy book used the single piece of paper technique above and the simple pamphlet stitch.
We also discussed ideas for binding journal pages you’ve created on separate sheets of paper. Altering recycled ring-binders as covers is fun
and then you can hole punch your art pages, or stick/stitch your pages onto base pages with punched holes. I don't have an example of my own, so this is a photo from Tam at Willowing using this method.
You can also create full spreads on watercolour paper and then sew them together after. This was the method I used for binding the lessons from Tam's She Blooms in ink Class.
You could also use the above technique to stitch art to base pages for binding. You can also create individual pages that are the same size and then bind them using a concertina paper hinge technique that you'll find HERE.
You can tie pages into a cover - we thought this would be a good idea for saving special occasion cards.
Then we moved to the challenges of repurposing/strengthening old books for use as journals. This is where I introduced my current recycled art journal. You can remove pages before you start – use masking tape for reinforcing joins or to mend tears.
Or just let your journal bloom and rebind if necessary. I use Bear tape – also could be called Duck tape. Needs to be strong and wide and sticky.
I mostly I leave altering my covers until the end. I love to start with a base of gold and then add layers including stencils and serviettes as 2 of my favourite recurring elements. The cover above ended up like THIS
Another fun thing is to replace a cover - when I made my watercolour journal in 2014, it had a spiral binding which meant I was easily able to make a new front cover with Pelmet Vilene
There are lots of fun methods of making holders for individual pages. This is a stitched envelope
and I made this lap top cover (also gifted away) which could just as easily contain art journal pages :
This is my Klimt in the Garden box
Also fun are Continuous pages like my cotton reel book :
and simple concertina books like that made for me by Zsuzsa of our combined art projects
I love my Canvas book which has a variation on folding to make its cover
My Garden accordion book holds tags
And this tag book is one of my favourite projects
Birgit Koopsen also has a great method for making tag books. Find her instructions on Youtube HERE
I finished by sharing my Butterfly Star Book : you can find instructions to make this form HERE.
Loved gathering all these methods for class and this post. I am amazed at how many different book forms I have made so far. Hope you find time to create this week.


Oh my, you've covered it A to Z! Wonderful examples of journals. No wonder we love making them- the possibilities for covers, binding, and pages go on and on. I'm sure your students benefited from seeing all of these and will go on to try lots of new methods. Great post!
ReplyDeleteThanks Nancy. It was really fun to gather them all up and the students went away buzzing with idea plus I was re-enthused to try a few of these forms again
DeleteWow, a treasury of book binding techniques! Seriously, enough material there to publish an entire book with step-by step instructions! A very useful resource for everyone! You know, I completely forgot about that little book I made for you - so I went back to my original post and read it again. That was the year before we moved and we visited Worcester cathedral - we actually ended up living in the area, even though we were not considering it at the time because of the distance involved! How spooky is that? And my husband finally got his Man Cave to put his sign up like he always wanted! Funny how things always work out in the end even though you don't realise at the time.
ReplyDeleteI have that little book up on one of my inspiration shelves and think of you often ♥ Amazing to think it was 2016 when we did that!
Delete
ReplyDeleteEnthusiastic words written in this blog helped me to enhance my skills as well as helped me to know how I can help myself on my own. I am really glad to come at this platform.Emergency Plumber