This is my 2012 year in photo form. Click on any to see them larger, and make your on photo mosaics here.
january
february
march
april
may
june
july
august
september
october
november
december
Wishing you, and everyone you love, happiness in 2013.
Monday, December 31, 2012
Friday, December 28, 2012
Creative Jump Start Summit 2013
I participated in the first Creative Jump Start in 2012 and have just found there is another one for 2013 - YAY
All the information about what and who and how is here and it's ALL FREE
This year they are sharing "3 Ways to...." help you jump-start your creativity in 2013.
Check out this post where I share a couple of links to videos we got last year. Great fun
All the information about what and who and how is here and it's ALL FREE
This year they are sharing "3 Ways to...." help you jump-start your creativity in 2013.
Check out this post where I share a couple of links to videos we got last year. Great fun
Monday, December 24, 2012
Saturday, December 22, 2012
Present pouch
Inspired by Roben-Marie Smith's tutorial for a stitched gift card holder I've increased the pattern size slightly and made a present pouch.
Instead of duck cloth, I used a piece of pretty fabric (reinforced with iron-on interfacing) and stitched on the reverse of it so that when you open the pouch it is lined
Like the frayed look and paua colours
Would like to keep it myself....but with a wee stitched tag, the gift is complete
And hopefully the recipient will find another use for the pouch.
Wednesday, December 19, 2012
Ornament play day
Had to have a play day with some lovely friends to finish the year.
We made sweet little ornaments with 2"x2" glass slides
The edges are taped, not soldered. This YouTube tutorial is similar to what we did but we used silver scotch tape and copper slug tape for the edges.
I only made 5 but they are double-sided - below are the other sides (click on photos to see larger, altho the 2nd is a little blurry)
They are then wrapped with wire and have small attachments for hanging on the tree. But I am tempted to make some into necklaces.
More Christmassy goodness : Joanne Sharpe has a FREE artsy holiday class Five Golden Letterings - open now.
Friday, December 14, 2012
An Altered book
I've been enjoying making books from scratch, but in the past I have enjoyed altering a book for a journal.
I first did this when I took a class with Kelly Kilmer - for that I used an old book of fairy tales.
Recently, I decided I'd like to try again, this time adding stitching to the mix...The cover is nice and plain which invites many different possibilities for alteration.
I started by tearing out every 3rd page so the book won't be too thick for its cover when finished. Then I gessoed the pages that will be on the outside when glued together
Gesso on the right hand page above - this will give a lovely toothy surface for whatever paints I add for colour, and partially disguises what's below, but also leaving the option of having lettering peak through. I've liked that effect in previous journals.
Next step, stitching pages together. Confession - I actually glue-sticked the edges of the pages together before gessoing, but the wetness of the gesso unstuck the pages. So after gesso I re-glued to hold it for stitching, and then stitched with different threads and colours.
I've only stitched a few pages cos I decided that leaving this step until the end will be handy if I want to stitch something on individual pages as I go.
I've coloured some of the pages with my koh-i-noor dyes and then did some experimenting with discharge paste.
Used foam stamps first and on the left you can see I sponged it through punchinella (click on the pictures for a closer view).
Love these paua colours. Another fun foam stamp.
Really love the discharge effect through the stencil.
Lovely leaf border using my new Luscious Leaves dylusions stencil.
And speaking of Dylusions...this is the effect of dylusions ink sprayed over gesso
And here's another attempt at Dyan Reavley's ghosting technique using water
So I'll hopefully get back to more fun with this altered book next year.
I've got Christmassy things to show you next week.
This is my 300th post! Thanks for being here with me.
Labels:
Altered book,
Paper and Stitch,
Spray,
Stencilling,
Watercolours
Saturday, December 8, 2012
Printing play day
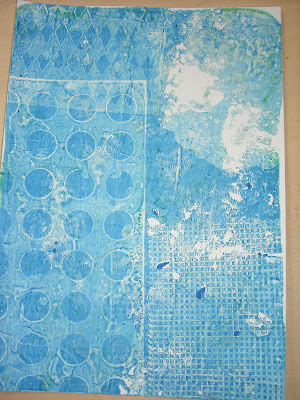
Lots of people seem to be doing monoprinting using Gelli Plates.
 |
| Texture print onto card |
 |
| Here's the plate inked up with paint |
 |
| Print 1 onto cardstock |
 |
| Print 2 on tissue paper |
 |
| Print 1 |
Masks can be cool. The stamping adds another nice layer.
Here I used a doily as a mask on the plate which gives possibilities for journalling spaces on pages
Using old book pages for printing is fun too.
 |
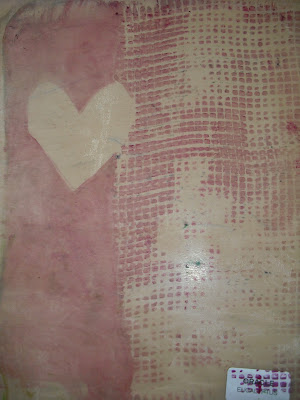
| Hearts masked |
 |
| 2nd print - heart masks removed (I started to tear out the lower one before photographing!) |
 |
| Pink print on organza |
The pink organza print laid on top of that base for a very cool effect
And I love this last one
 |
| 2nd print off pink plate (heart mask removed) to cardstock Overprinted with green |
Have a wonderful weekend
Subscribe to:
Comments (Atom)


.JPG)


