And from the blog for Life Documented 2017 HERE : Prompt: To incorporate under paper into your page.
Challenge: To add art marks and doodles into your page somehow.
AND HERE : Prompt: Doodle around shapes
Challenge: Cut shapes from paper or print art marks onto stickers
Ironically, this ended up being more work I think! - but by giving myself permission to spread it over time I enjoyed it more ♥ I decided to make a couple of spreads so that I could art journal one and document my busy weeks on the other like I did in Weeks 19-20 last month. I've highlighted all my prompt-related decisions by using green text. First spread - keeping it simple with under paper for the base
Then added hearts. They were cut from inky text pages. I was going to use found words but they were a bit small. When I did my mood journaling, I had first tried printing the words on deli paper. They weren't transparent enough for that project so I used them here instead.
Added marks and doodles - keeping it simple with mainly messy outlining
and then I was able to find some appropriate found words from a large print book (text pages)
And here's that first spread finished. Loving the gold from the underpaper.
Then I decided I'd need 3 pages for the next spread to fit all the fortnight's worth of journaling events so I again added under paper for my base, and wrapped it around the back to cover the flap as well
Time to add a heading with more found words from an old calendar and large text pages
I have felt especially lucky and grateful - my word of the year is SHINE. Then I began to add my journaling blocks. Used some lighter under papers since the base is quite dark but lovely as a background where it shows.
Stamping on paper and then adding it as another layer is also fun. I completed my mood journaling spread on Thursday so thought it would be fun to repeat my butterfly mask technique here
And then it was time for my birthday party journaling - I found lots of lovely appropriate found words to add amongst just a few photos that will instantly take me back to that fabulous night of celebrating with my family and friends.
See my previous spread HERE if you want to find out more about my celebrations. I was able to journal on an information card from my new tarot deck and attach it as an extra flap detail on the third fold-out page of my spread. We are now celebrating my youngest son's 13th birthday this weekend. You can see why it's been a challenge to fit art in ♥
Then I just needed to journal on the back of the flap. Using a good quality sticky photo paper (sorry I had an unmarked roll given to me by a friend so I can't give you a source) I printed out the progress photo of my background before adding the mask and glaze layer to my mood journaling page.
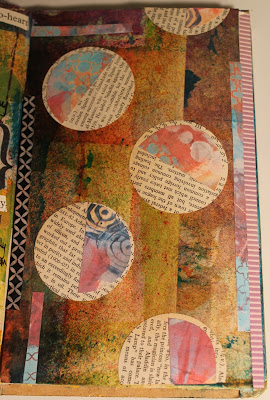
This is another reason to take good progress photos! I wanted to incorporate text paper, Cut shapes from paper or print art marks onto stickers, and then doodle around shapes - all on the under paper base
Cut circles from the text paper and added some overlays of the printed art (colour not true - taken at night). Glued down these and some extra strips for interest on the page
Time to add doodles and I love how this turned out
Here are the completed spreads for Weeks 24 & 25 in order as you turn in the pages in my journal. Click on any photo in this post to see it larger.


