Showing posts with label transfers. Show all posts

Friday, January 7, 2022

Back at Fodder School

I've had to break from Fodder School because my December was extra challenging but
 I'm so excited to get back to these lessons now. I'm on holiday so I've got some lovely play time ahead. 
November's instructor in Fodder School was DeeDee Catron and you can find more about her HERE where I shared my stamp carving explorations. She shared 3 lessons about making fodder, the other two being chipboard alteration and image transfers. I realised I haven't shared what I did with those. I've done many image transfers before. See some ideas HERE and DeeDee shared a simple packing tape transfer which I first discovered via Julie Fei-Fan Balzer on YouTube. I tried it again just to make sure I remember how. 
The toothbrush was a really good way to get the wet paper off. 
Once dry the tape gets its stickiness back so you can apply it over other elements or use as you would patterned tape. Store on baking paper.
Grungeboard is a product created by Tim Holtz and when it was first released (more than 10 years ago!) it was all the rage and I purchased and was gifted a bunch. From first glance it appears to be chipboard and can be treated the same as chipboard (painting, sanding, stamping, etc.), but it is pliable. You can bend it, distress it, and it won't rip like chipboard. You can stitch it which I also love. I used some of the shapes all those years ago for masking sprays, and I did this project creating a garden fairy - her wings are grungeboard. 
If it wasn't for this class, it would all still be sitting in a drawer untouched....but now it's become part of my fodder keeper so more likely to get some use.
I decided that I wouldn't do DeeDee's final project at the moment, but I have lifetime access to this class so some of these techniques may just show up in a project in my future. 
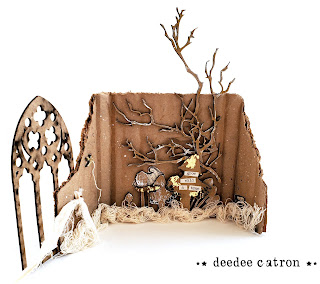
I was very excited as I saw interpretations from classmates of our lessons from our December instructor, Aimee Bishop. Her main project was these gorgeous mixed media amulets
I waited until now to start because there are so many amazing techniques to explore from the first part of the class before we even get to this project. Every teacher is hitting it out of the park for us! 
First up I wanted to try some natural dyeing with fabrics and fibres I already had in my cupboards : aida cross stitch cloth, PFD (prepared for dyeing) white fabric, scrim (muslin), mulberry silk filament yarn, some old lace, tatting and serviettes. 
I am so thrilled with how they turned out.
Here's the tatting with an original bit on the right to see colour changes. Subtle but so lovely.
The prepared for dye fabric and scrim had some variation where I used rubber bands for resist
but the Aida cloth was the biggest and really gorgeous variation. 
Next up is mark making on papers and making embellishments. Will share soon.
See all my posts about Fodder School HEREIt's not too late to join usDeeDee has also kept a record of where we can find any lessons that have been shared from the original #fodderchallenge in June 2021. All the artists featured there are going to be teachers in Fodder School.

Thursday, July 11, 2019

Face image transfers in your journal

Last month, I shared my samples in my journal from when I taught a class about transferring an image from your printer to your journal. Apply gel medium (I use 3D gloss super heavy Reeves) and adhere your image face down smoothing to make sure there are no bubbles. When dry, spray with a water bottle and rub the paper off gently leaving the ink transfer behind. The black and white image was a photocopy, and the colour from my home printer (Canon MX726). Both worked really well. Great free images available from Unsplash
I purposely demoed for the class in my journal so I had 2 pages begun. Now it's holidays I've had time to get back to them and I'm really thrilled with how the first one evolved....Simply started with black gesso, black posca pen and skin toned acrylic paint just to get the basic shapes in. I fancy doing something special in all that black hair. 
Once I did that blocking and it dried I realised that there was still quite a bit of pilling from the paper underneath - perhaps I should have done another wet and wipe. Anyway - covered with clear gesso and then proceeded. The rest is in photos only - click on any to see larger. 
Will share the other face next time.

Sunday, June 9, 2019

Teaching : Faces, Image transfers and useful links

I taught my monthly art journal class this past week and the topic was Faces and Image Transfers. I wanted to make sure that there was something useful for everyone, even if they didn't want to do human faces. Only a 2-hour overview class  but we covered a lot, so I thought I'd share some of what we covered here with links to the blog posts I've done in the past on these techniques. 
1. Transfer with a photocopied image - place face down on your receiving paper and rub from the back with nail polish remover (acetone). Works on good watercolour paper - results not guaranteed on other papers (eg. wouldn't work in my recycled journal)
2. Transfer with an image from your printer at home. Apply gel medium (I use 3D gloss super heavy Reeves) and adhere image face down without bubbles. When dry rub paper off with wet finger – gently. Demo with home printer (colour) and photocopy (black and white) Both worked. Great free images available from Unsplash
I should have thought about covering the background more on the right but will be interesting to see what I can do with this. I look forward to sharing how these finish up in my journal
These are some examples of my students' work with this technique - they make me smile
3. Paint over collage : my blog post HERE
and Tam's original free lesson HERE
This is also in my journal - I figured if I put the samples in there they would be page starters! 
4. Proportions of a face - in this section we also talked about different pencils including Stabilo All pencil and Dina Wakley's technique as seen in this blog post
Included some info about other watersoluble pencils for portraits as seen HERE
and how fun using just a charcoal pencil and a blending stump can be 
I thought I would reference here my favourite face artists so you can explore them if not known to you. 
I love owning this book by Tamara Laporte
and I will be getting this when it's released in August
Check out her Youtube channel for free inspiration HERE and if you join her newsletter HERE you get a free course called Art, Heart and Healing 
and also alerts to classes that are offered for free for a limited time. This one is currently through her newsletter as a promotion for her Ever After course : 
Jane Davenport's style is very clearly laid out in her book 
and she has a new FREE class coming up 24 June : HERE.
Description of the course : Making Faces is a unique collection of Art Supplies from the mind of Jane Davenport! In this free workshop we celebrate the global launch of the collection, we have gathered all of Jane’s videos and info for each element of the collection in this one spot to make a valuable reference and resource! Not sure how much will be about face making, but gives you a taste of Jane as a teacher anyway.
My other favourite teacher, and the only one I'm doing online classes with this year, is Effy Wild. Check out her Youtube channel HERE
her Free workshop which includes a face HERE
Artists for love (speed painting)
and this contour drawing HERE
And last for your inspiration, check out this selection of free tutorials that include some faces by some great artists : A thing called love - includes lessons from Toni Burt, Cary Cutler Scholes and Angela Kennedy - all of whom I've shared elsewhere on this blog. This is Cary's lesson : 
16935702_10208671012587849_1595738626_o
I love sharing my joy of art journaling and mixed media. If you're local you can ask me to come and teach at your club/group. You'll find the posts about classes I've taught under the teaching link below.

Wednesday, February 6, 2019

Self-Portraits

A day off for us today and I got a bit distracted looking at other people's art...Very inspired by Caterina who has a tradition of creating a self-portrait in her journal every January. I wish I'd thought of that! And then I realised that I have created self-portraits over the years - just not at the same time of year. These are the portraits that began with my actual face (using an actual outline of my face in some way) or something about them feels to me like they became personal.
I began my journey with creating faces in January of 2015. I took my first Life Book class then with the intention of learning how to create faces and this Beacon of Light was my first ever face! I feel like it looks like me because of the colours and symbols I used and the brown eyes and "curled hair" ♥
A week later, I was posting this
February 2016 begun with an image transfer of an actual photo of my face
Although I didn't begin with with my own face in this paint over collage in July 2016, this next one really feels like a self-portrait - I think it's the imagery, colours and brown eyes/curly hair
January 2017 - a repeat of that image transfer technique (even used the same photo to transfer)
And even repeated again in March 2017 for my vision board 
April 2017 - begun by tracing over a photo of me
November 2018 - another traced-ish beginning
Now for February 2019....I did actually start it today so I will share soon I hope.
Related Posts Plugin for WordPress, Blogger...