
Have a look at how this project started here, then I added foils here, so began the next stage with this


 |
| Bronze |
 |
| Silver |
 |
| Cerise Pink |
 |
| Black |
 |
| Lime Green |
 |
| Comparing silver and black |


|
| Bronze |
|
| Silver |
|
| Cerise Pink |
|
| Black |
|
| Lime Green |
|
| Comparing silver and black |

.JPG)


 |
| Mine |
 |
| Katherine's |
 |
| Rhonda's |
 The velvet samples are embossed velvet using the techniques shared by Jacinta Leishman on her blog in this post. We followed her instructions and created some lovely samples.
 Distress Ink Pads are a Ranger product - more info here - they are lovely to work with since they blend really well, and stay wet a bit longer so you can create interesting effects. The colours are also very yummy. First experiment was water stamping - basically you ink the card, put an embossing stamp pad onto a stamp and then mist it with water. Once you stamp it on the inked background you dry it with a heat gun and the image fades like bleach. I should note here that I used watercolour paper which meant the ink didn't blend as well. Katherine's background is much more subtle, and I learned that lesson and used smoother paper for the rest of the experiments.
 Next was inking the paper followed by stamping an image with Embossing ink and applying clear embossing powder. Once this was heated and cooled, we re-inked over the top with a different colour. Then ironed it with newsprint so it stopped being shiny. Mine turned out really well because there was good contrast between my first and second ink colours. It is yummy in person.
 We tried applying acrylic paint to a stamp next, and then inked over so that acted as a resist. Didn't really think that was anything different from similar 'resist' techniques we've tried, but a good reminder of a nice effect.


 Once dry, you turn it face-down on your chosen fabric, and iron over the release paper. Once cool, peel off the release paper, and you are left with a lovely layer. You can iron onto a variety of fabrics. This is onto velvet - the purple layer beneath that spiral.
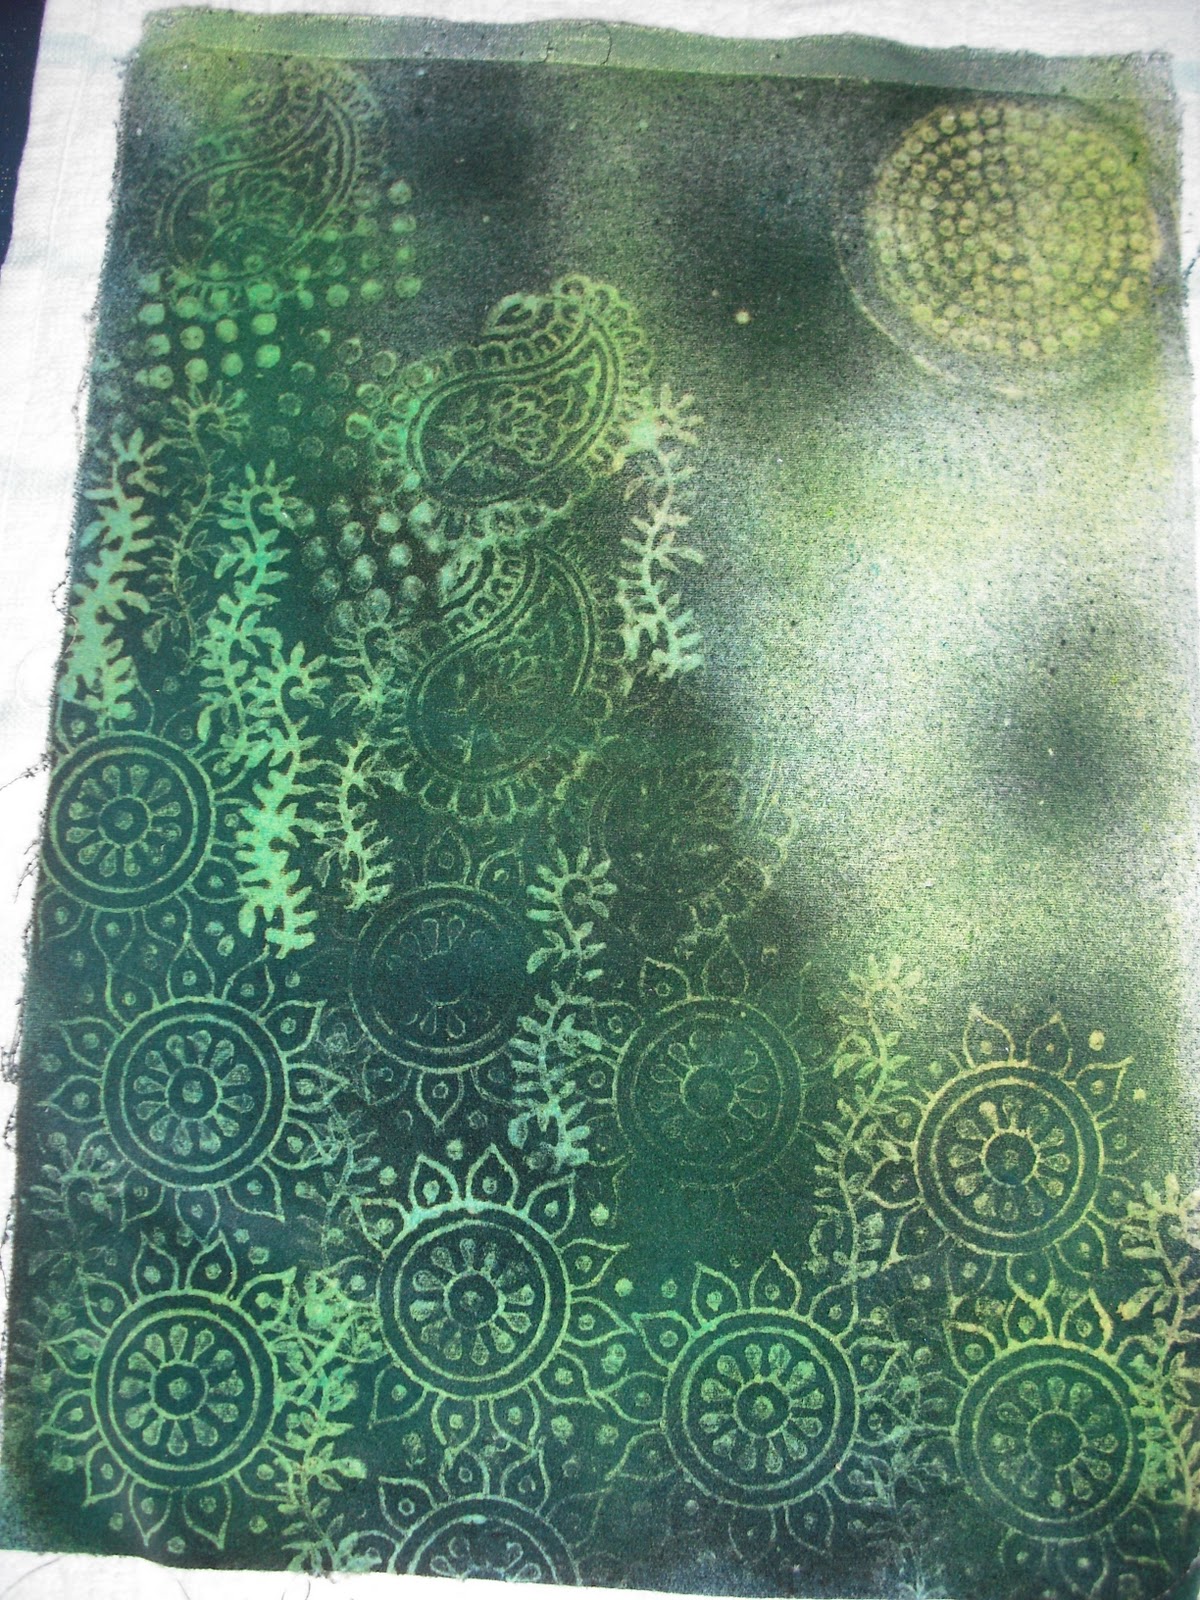
 This is onto green cotton. Some of it stuck a bit when I tried to release it, but I think that just adds to the lovely textures. And once you sew or embellish over it, you won't notice these small imperfections.
 This is also onto cotton but I cut the fusible into heart shapes before fusing down.
 This is onto lutradur (hope to show you this project completed within the next week)
 And this is onto organza.
 I did a class with Sandra Meech and she used this same technique, except with ordinary acrylic paint. We painted in deliberate layers so that when we ironed it onto a medium weight interfacing, it is ready to be the base for a landscape creation.
 As you can see, you can use this technique for many different applications....give it a try & let me know what you come up with.
 This book is fabulous, bringing together lots of great techniques to create Art Quilts. It contains many of the wonderful contributors to Quilting Arts Magazine - I have a subscription to this magazine and look forward to its bi-monthly arrival in my letter box.
 Don't be put off by the sheep on the back cover! This book has some really lovely ideas and useful techniques for making art quilts, using lutradur, and creating lovely velvet bags :-) Then we had a Play day...I started by cutting a piece of black velvet.The top of this piece is vliesofix painted with purple lumiere paint, and then ironed to the velvet when dry.I applied fusible web to the back of some easter egg foil, and then cut the swirls out and ironed them over the top of the vliesofix section. For the green section, I ironed fusible web directly to the velvet, and then ironed some Jones Tones foil paper (I just found mine at Spotlight) through sequin waste onto it.
  The piece below has had more foil adhered through sequin waste, and then the squares and triangles are chocolate foils attached using the same method as the swirls above.
 I then placed a chiffon scarf over this entire piece, and stitched around and over the different design elements with metallic thread. I cut the scarf away where I wanted to see more of the foil effect, but left it to show the stitching on top of the foil shapes. I added beads, then cut the bag shape and sewed it together adding a lining. The 'handle' is made by zigzagging together a variety of threads.
 The bottom is finished with a painted silk cocoon case, stitched and beaded, and hand-dyed silk threads hang from it.
  This is the completed bag. It was a fun project.
 Left to right : Katherine's, My card, Lisa's. It is cool to see how we each approach things and how the finished cards are individualised. We always learn lots from each other.Katherine showed us how to stitch felt and organza together to make lovely christmas stars.
 This is mine finished. The velvet is layered over felt, and free motion swirls are stitched with metallic thread over the top.
 Not a great pic, but hopefully you can see that the moulding paste is raised and is textured so creates a cool effect.