Showing posts with label Tissue and Serviettes. Show all posts

Saturday, April 17, 2021

All Occasion Cards

I needed to make some more birthday cards and I had this wonderful piece of watercolour paper which I had used to clean my stencils when I taught a class a couple of years ago.
I decided that I would cut this piece down randomly to fit my card fronts when stitched on - and suddenly I have really cool unexpected backgrounds to use. 
My dragonfly from my gelli journal collage fodder play looks great on this piece
And here's the completed card 
I saw this sticker book on a post the other day and decided it would be useful for me to own...
They make nice easy additions to these backgrounds for future cards. 
Did you spot the hot tip I learned recently about separating serviettes by using tape?!
I have shared before that you can isolate images by drawing around them with a damp brush.
I really love serviette images on cards
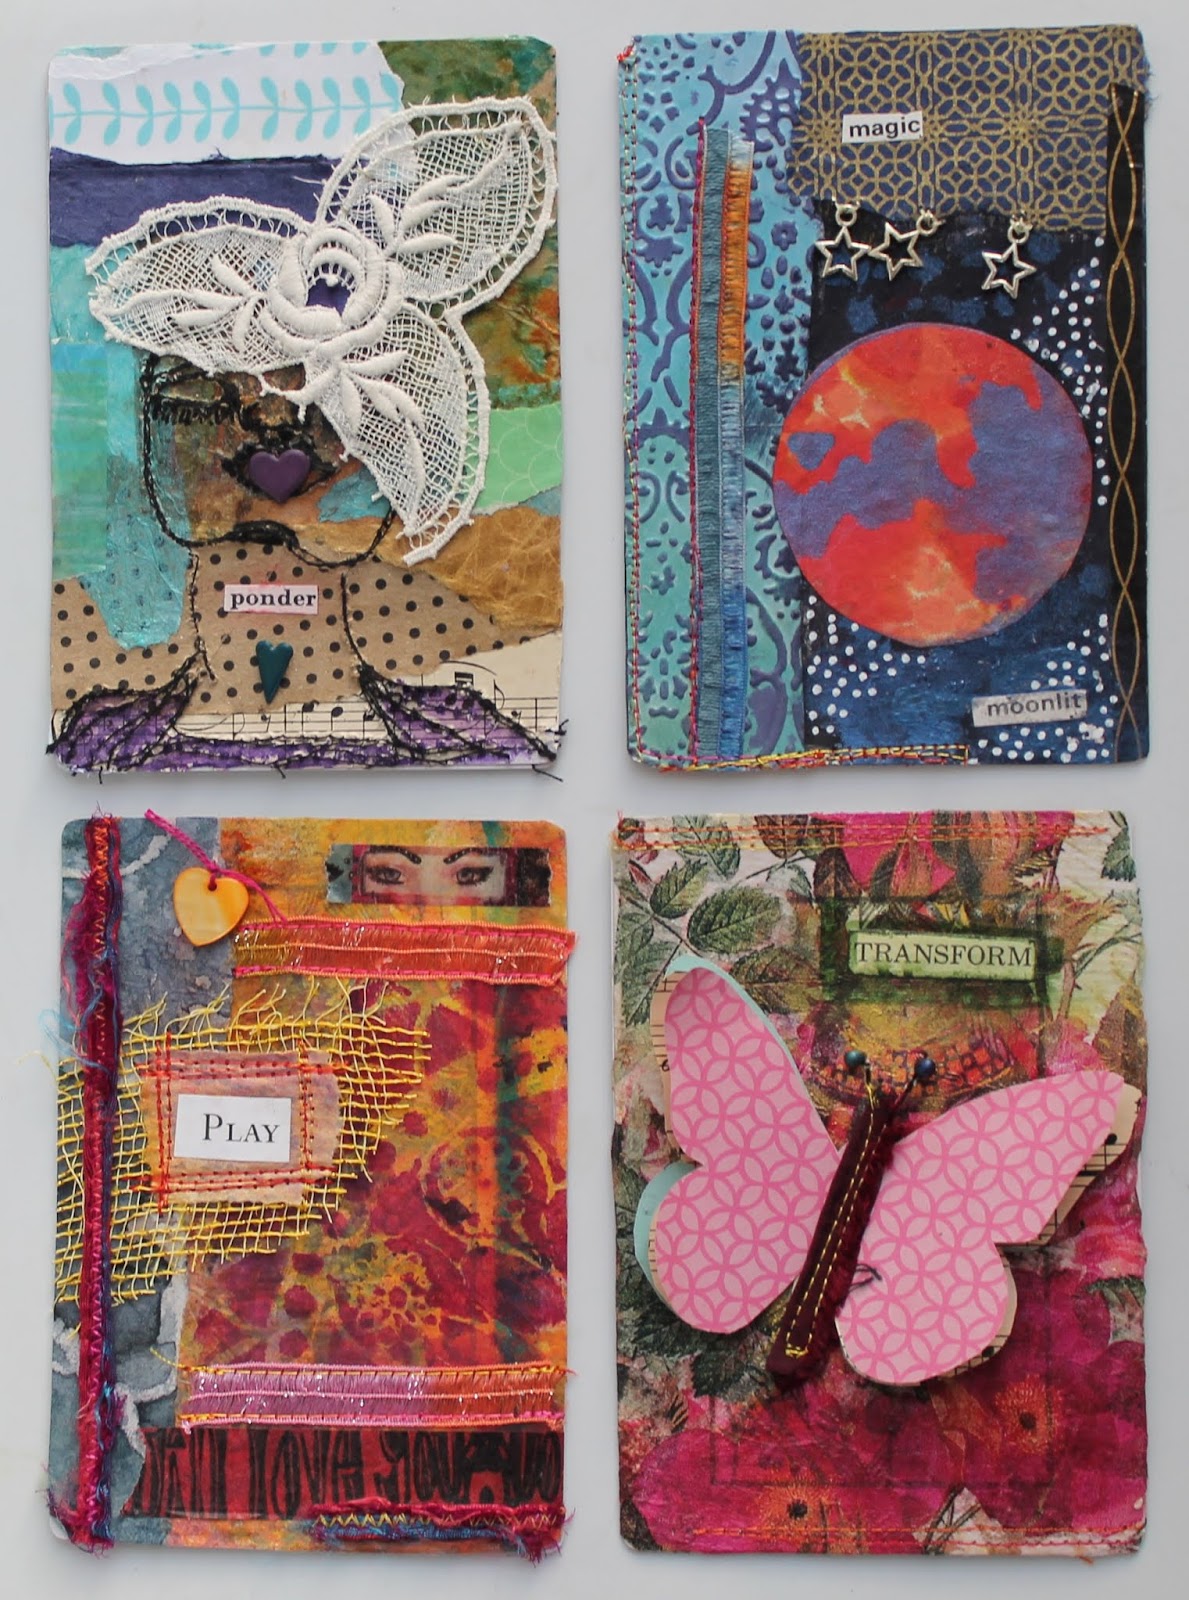
And here's the whole collection from what started as random pieces. They just need some found words added as the occasion arises.
Now happy to say that today is the start of 2 weeks of school holidays. Hopefully lots of creativity will be happening around here to share with you.

Sunday, March 28, 2021

Wanderlust : Embrace the process

This was our last lesson for March on our theme of Serendipity : Week 12 with Mary Beth Shaw aka Stencil Girl
Our first lesson was to create 'parts' - We created serendipitous colour layers with tissue
I've bought a cheap silicone spatula from KMart to use for gluing - no more brushes being ruined. I just wipe it clean with a baby wipe or damp cloth between uses. 
Then I made little assemblages for collage fodder - I enjoy adding stitching to many of these.
Some learnings or good reminders : always art with paper beneath to get interesting pieces from bleed through or using up paint = lovely serendipitous pieces. 
Pull layers of paper serviettes apart easily using a piece of tape on each outer edge (seems so obvious but I never thought of it!)
Next up to create our journal spread. As Mary Beth suggested, I pulled out bits in a limited colour palette. First layers of collage from the underpapers
then more collage, including tissue layers, and paint. I've also started using old neutral scrap book papers for my underpaper. Hopefully I'll use them more with my own marks of colour added.
Mary Beth's style is very much about embracing the process of art journaling and to keep going until you are happy. I did just that and forgot to take process photos so that's a good sign that I had fun.

Wednesday, March 18, 2020

Journal 52 : Week 11

Journal 52 is a weekly prompt from Effy Wild (Free HEREthat I'm creating on a deck of jumbo playing cards 3.5'' x 4.75'' (8.5 x 12 cm)Each card will include stitch, a found word, and be inspired by the project I've been working on that week or what's lying leftover on my work table. See the original post HERE.
#11 : Dream. Inspired by what's on my worktable this week I gessoed a playing card and created the base alongside my March book papers
Inspired by new supplies....The wood blocks of the Piwakawaka/Fantail and the Huia (now sadly extinct) were recent purchases from Tatter Tales in Waipawa. 
My friend picked them up for me after I saw them online and I am very much hoping we can take a trip to Napier in the future so that I can make a stop off on the way and be tempted by other lovely things in person! Although these are made for printing on fabric, I thought I'd see if they would work on tissue so the Huia could become a part of my Dream card. Staz-On ink pad did not work (faint impression on the left below) and the Golden transparent paint didn't show up well but the black ink worked great. I printed with the tissue on top of an old mouse pad to ensure best contact and will refine with colour when glued to my card. I clearly need to find time to experiment more with inks and paint... 
If you use a paintbrush just wet with water, you can outline the stamped shape and tear it quite close. Then apply your gel medium to your substrate (in this case the card) NOT the tissue. Keep the glue brush by your hand without rinsing, lay your tissue down in one motion on your glued background, then use the glue remaining on your brush to gently smooth the image out from the centre to get good contact and no bubbles. Don't go over too much or your tissue will tear. 
Takes a bit of experimenting to get the right amount of gel medium/glue (not too little, not too much) but it's worth it when you perfect this technique and I use it often. Love how the tissue paper blends into the background so you can still see the layer beneath. Click on any photo to see it larger. This is the finished card for Week 11. 
 Find all my Journal 52 posts HERE

Thursday, March 5, 2020

Journal 52 : Week 9

Journal 52 is a weekly prompt from Effy Wild (Free HEREthat I'm creating on a deck of jumbo playing cards 3.5'' x 4.75'' (8.5 x 12 cm)Each card will include stitch, a found word, and be inspired by the project I've been working on that week or what's lying leftover on my work table. See the original post HERE.
#9 : Transform. Inspired by butterflies - they are a favourite that crop up often in my art. And of course I'm transforming jumbo playing cards every week. This one started by gluing down 2 layers of some serviette leftover on my work table from my most recent art journal bloom page.
In addition to my found word and stitch, my elements were a layered butterfly and stencil. 
Fun to play with layers in a different way this week. This is not a card deck that will be shuffled!
And that's the end of our second month. I am inspired to see the cards together. 5 weeks of prompts in January :
4 weeks in February : 
Find all my Journal 52 posts HERE.

Saturday, November 30, 2019

Art journal class review

Taught my last art journal class for the year on Wednesday night. We've covered a range of ideas for how to work in your art journal and this was a fun way to put all of that into practice. I had told them to bring limited supplies and that we would work together to create a page from start to finish. They needed to come with a quote or poem or found words and a focal image so they had a focus for the page. Then to choose a limited colour palette and select appropriate paints, markers, stamps, background collage papers and serviettes. This was all I took to class :
Their class notes had the following headings : 
1. Use paint (scrape it, brush it, baby wipe it)
2. Stencil
3. Words (found in the background, do your own lettering, stamp, cut out)
4. Paper (background, serviette, focal)
5. Cover something up with gesso
6. Markers/pencils (outline, lettering, shading, highlights)
7. Stamp
8. Drip/splatter/ink/glaze
I had written these numbers on popsicle sticks and they were in a jar so we couldn't see what we were drawing out. We got started by drawing a number and then doing that prompt on our page with a timer set for 5 minutes. It worked brilliantly - there was lots of laughter and everyone really enjoyed the bit of pressure of limited time to stop them thinking too much and to 'just do it'. They have learned during the year that nothing is a mistake and you shouldn't fall in love with your first layer or you won't want to cover it up!
I took progress photos as I did each prompt
5. Cover something up with gesso - the others already had prepared pages so this wasn't a good start for them, but I went ahead and scraped gesso on my page to cover over the darkest parts of my book pages. Some hadn't thought to use a credit card in that way so a good start
2. Stencil - a reminder that if you do something in one part of your page you should repeat it in another. 
7. Stamp - I used paint and tried to add some dark areas
8. Drip/splatter/ink/glaze - I shared three things here. A : the use of acrylic ink and transparent paint (Golden brand) to create a layer that unifies but also allows the previous layers to shine through. B : flicking paint loaded on a brush to create spatter. C : Drippage : again using ink/paint with flow and adding water. My drips didn't flow as well as they might because not all my background layer was covered and the paint soaks into old book paper instead of traveling. More lessons learned.
3. Words. First I found words in my background which I outlined with black Faber Castell Pitt pen. Then I cut some additional words found on a large print book page - I just brought a couple of pages from a recycled romance novel hoping there'd be something inspirational. You'd be surprised how often serendipitous looking works
The others wanted a little more time so we set the timer for another 5 minutes but I was happy with my words so I just outlined the larger ones with my Stabilo All watersoluble pencil and then smudged it using gel medium so it is sealed from future movement.
4. Paper. I did bring some background papers which I didn't use, but I had a beautiful serviette which had served as the inspiration for my colours and I managed to use it well around the page as my focal images
After that last prompt stick draw, we agreed we were all at the stage to do what felt good to finish our own page. For me I needed a glaze to fill in the gaps uncovered by any media. 

Especially lovely to have the iridescent and metallic paint shine up through this layer.
What follows are the student pages - amazing that we followed the same prompts and got such different results. 
My page was almost complete by the end of the night and I just love the layers but the bright yellow green spot was drawing my eye. I added some Noir iridescent paint around the page through punchinella and it made all the difference. From this 
to happy to call it complete : 
It's been a fantastic experience teaching these art journal classes and one I hope to continue in 2020. 
Related Posts Plugin for WordPress, Blogger...