Monday, June 15, 2015

Paper & Stitch Collage Play day

I love Anne Brooke's work and wanted to make a collage inspired by her style. I live too far away to take a workshop with her, so this past weekend, 3 of us got together for a play day to see what we could do by ourselves. It was a fantastic day and I came home with an almost finished piece. Here's how mine developed :
Collaged background onto a base of wallpaper.
Lovely batik fabric from my stash makes great flower base
First auditions
By lunchtime, all the main pieces were glued down ready for machine stitching.
After lunch it was time to get out our sewing machines.
Good idea of my friend is to have a small test piece to make sure tension is right and to audition stitches. Because we had 2 layers at least in most places (the bottom layer a piece of wallpaper cut to size) there wasn't any problem with machine stitching through the papers. Although I have my gorgeous new machine for quilting, I am still using my trusty Janome Memory Craft 4000 for stitching paper. 
Finished with the sewing machine
The back view
End of day : 
Click on any photo to see it larger
Thought you might like to see the other pieces before any stitch was added, and at the stage we finished our day.
Our hostess stopped to make lunch and our lovely drinks and snacks through the day but still made good progress. Her dandelion heads will be more obvious once stitched. 
The fox is very cute
Even lovelier with the stitching. The piece is now ready for hand stitched details. 
It especially makes me smile that we can do the "same" project and get such different results - if you know us, you would know these are very indicative of our style.
By the end of the day, I had done some hand stitched x marks and some bar stitches on the edge of the cream paper. 
Yesterday I got some time to add some beading. 
To finish this piece, I wanted it mounted to a canvas. First I added some paper collage to the edges, and then I used super heavy gel medium to fix the art securely.
Although I cut my initial piece of wallpaper to fit the canvas size exactly, I like uneven edges so had lovely overlaps by the time I was done. Really happy with the finished piece

Friday, June 12, 2015

LB2015 : What you've missed...

You may be wondering what's been happening with me and Life Book lately. I haven't shared anything since I finished my last challenging project at the beginning of May! 
Be assured, I haven't given up and I still ♥ this experience VERY much. 
So far I've completed 13 full projects which I am very happy with in the first 5 months, especially when I explain about bonus lessons...
The Life Book year is structured with weekly lessons (this is week 24). The main lessons include a video (minimum 30 minutes, often well over an hour in my experience) plus supporting PDF. On alternating weeks, there are "Bonus lessons" which are shorter and less detailed. They may just be for inspiration (a fast forward short video of an artist creating), they may be an artist interview, a meditation or they may be a quick experimental technique. They are timed so we can catch up on some of the more in depth lessons we might want to spend more time on. 
One of the people I've loved listening to was Andrea Schroeder - she had a bonus lesson where she talked about the magic of presence and being in the moment. It was great. She offers a free 10-day journal class called "Give your dreams wings" - I haven't done this yet because of my commitment to other projects at the moment, but please let me know what you think if you do it.
Check out the intro and sign up for "Give your dream wings" HERE.
Get a taste of Andrea Schroeder's style in this post titled "No time for your dreams? Time management is not your problem".
Find out what artist interviews are like by checking out the one Tam did with Jane Davenport in LifeBook 2012 HERE. This year so far we've heard Jenny Doh and at the end of June we'll have Jessica Swift. It's really interesting to hear about how different artists approach their creative process.
I took this course to get out of my comfort zone and try some different ways of making art (eg. faces), because it promised to inspire and nourish my creative soul - and so far it hasn't disappointed. 
There's a huge variety of talented artists on offer through the year. Some I've been watching and enjoy their process, but I don't feel moved to create art from their lesson at this time. Juliette Crane falls into this category for me - you'll get a feel for her process by checking out some of her videos HERE
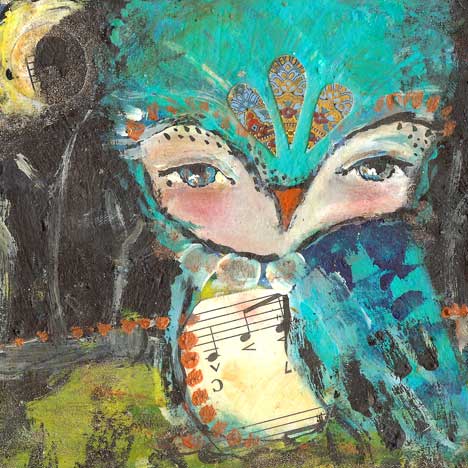
Art by Juliette Crane
Just a couple of artists have demonstrated techniques I'm already familiar with. I've taken quite a few classes with Alisa Burke. It was great to see her week's lesson about the art of field journaling and drawing feathers with a watercolour background technique. I encourage you to check out her FREE online class called Finding Your Muse which has a similar message, and also to take any of her sketching or doodling classes. She is a generous teacher.
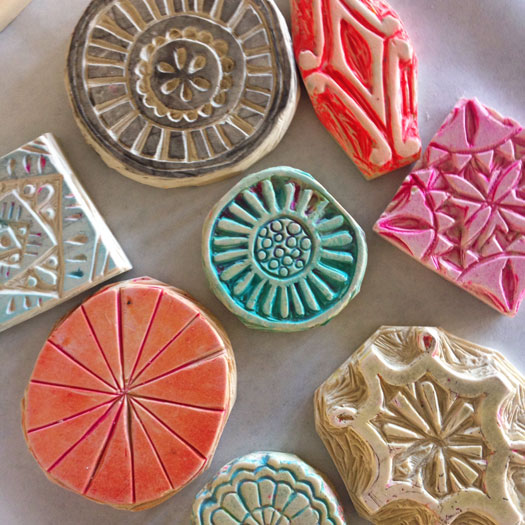
Jessica Swift offered a lesson in hand-carving stamps. Check out some of her stamping here. Again, I've already had a go at this technique - you can see my efforts HERE.
092214-workshop7
Stamps carved by Jessica Swift
So that's a catch up on what I've been seeing but you've been missing. There are also a few lessons that I want to have a go at, but just haven't been able to find time for yet. I'm currently working on one, so hopefully get that finished to share with you soon.
You can see all my posts about Life Book HERE and I've created a Flickr album for all my Life Book projects HERE.
Hope you can fit some creativity into your weekend.

Tuesday, June 9, 2015

Week 23 : DLP 2015

Information about the FREE weekly Documented Life Project is HERE. We're into a new month and therefore a new theme for June :  
I really love looking at what art supplies people use, and this week Lorraine Bell included a really lovely video about what she takes in her Traveling Art Kit - check that out HERE. Here's this week's challenge from that theme :
No big travel plans in my future, but I love to go to the beach - it always rejuvenates me. So I started by applying some paint with a wet wipe - one of my favourite techniques for getting down background colour. 
Interesting the colour variation of the same paint on the different kinds of paper in this Dylusions journal - see how the left page is whiter than the right one? I went on to apply some golden brown tonings like sand, and then rolled some white paint on a swirly roller for the effect of white foam of water
I wasn't sure where I wanted to go next, and then I remembered Nichole Rae's list-style journaling from her book which I shared in this post. And I was off....
Here's my list-style journaling - feels like I wrote poetry here :-) 
Click on the photo so you can read it larger
Printed it onto some brown paper through my printer and then tore it and used a finger applicator to get some blue ink along the irregular edge. I really like that effect. For my "illustrative art" part of the challenge I decided to draw some shells and a feather onto watercolour paper - inspired by photos and techniques learned in 2012!
I also figured that a travel page needed a luggage tag
I couldn't resist adding some of the texture techniques we used in last month's challenges, including cheesecloth/scrim 
fabric and stitch (also evidenced in the tag above)
I decided to include a photo of myself at the beach as well, so my spread turned out to include a variety of elements. I think I could use this style in the future for travel journaling.
Click on the photo to enjoy it larger or see it in the Flickr album I've created for all my Documented Life 2015 spreads HERE. You can see all my posts about this project HERE.
Related Posts Plugin for WordPress, Blogger...